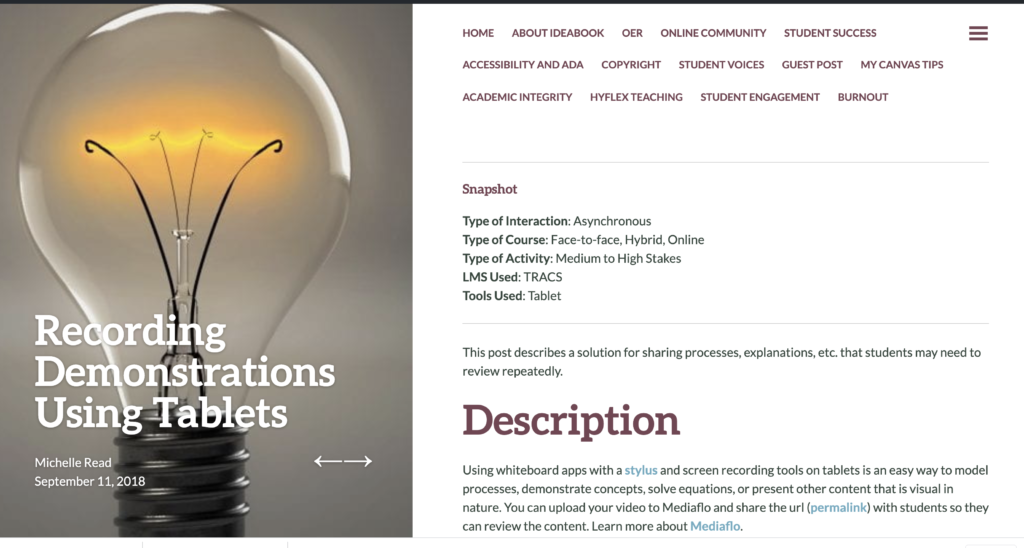
• Slider Image
About me...

About me...

A teacher at heart, I have nearly 30 years experience in education both teaching students and providing faculty development.

Read More

My work...

My work...

Here are several examples of my work from the last few years, including design documents, videos, and other multimedia.

Read More

My writing...

My writing...

Here are some of my most recent book chapters, journal articles, conference proceedings, presentations, etc.

Read More

Two new book chapters

Today, we received word that we had not one, but two, book chapters approved for inclusion in the upcoming Handbook of Research on Online Discussion-Based Teaching Methods. The first, Gamifying Discussion Forums, was headed by Alex Nagurney (U of Hawaii @ Hilo) and Patrick Smith (TXST) is also co-authored by myself, Gwen Morel, Ann Jensen, & Tammi Butcher – all from within the Office of Distance and Extended Learning at TXST.

The second, “Using an AI-Supported Online Discussion Forum to Deepen Learning” is authored by Tammi Butcher, myself, Gwen Morel, Ann Jensen, Patrick Smith, and Alex Nagurney.

This book should come out in May 2020.

AERA 2020 – San Francisco Bound

Looking forward to attending AERA in San Fransisco in April 2020 to present my paper, “Ultimate Impact of Faculty Professional Development for Online Course Design and Instructor Preparation“. This paper presents final data from students regarding the impact of an intensive 5-week faculty development provided to teachers at Texas State University to deliver courses to undergraduate and graduate students in online and/or hybrid format.

While I’ve been to San Fransisco, Greg has not, and so we are looking forward to doing some touristy things, including visiting Alcatraz. Then, we plan to pop up to Seattle to visit our son, Mike, his wife Joy, and our granddaughter, Elizabeth. Very excited.

Tracking Copyright – an ODEL IDeaBook Blog contribution

One area of notable concern in preparing instructors to teach online is the importance of attending to copyright. This post follows another by Texas State’s Copyright officer, Stephanie Towery, on how to request permission for use. The piece introduces a tracking worksheet for keeping up with various copyright issues in one’s course.

https://ideabook.wp.txstate.edu/2019/09/09/tracking-copyright/


Tracking Copyright post Screenshot

Snapshot

Type of Interaction: Content Copyright
Type of Course: Face-to-Face, Flipped or hybrid, Online
Tools Used: MS Excel


In the IDEA Book post, Copyright: How to Request Permission by copyright officer, Stephanie Towery, we learned that there are times when we need to get permission in order to use images, videos, books, music, and other content created by someone else. Depending on how many items need permission, you might be wondering how you can track all of this documentation. To make matters more complicated, just because we have permission to use material in our face-to-face courses, does not mean that permission automatically extends to online learning environments, such as Sakai or Canvas.

Some instructors avoid dealing with copyright issues by using only public domain or Creative Commons materials or by creating their own resources. However, some courses necessitate use of others’ work. In the Office of Distance and Extended Learning (ODEL)’s faculty development, we ask participants developing courses with us to track copyright for materials used in the course utilizing the following Copyright Documentation Summary Template.

Copyright Documentation Template

The template provides direction and several examples for different types of materials such as student work, graphics, movie clips, images, book chapters, etc. Many opt to include items they created themselves, or items they link to, simply to have a single place to reference should the need arise. In the notes section, the instructor reminds themselves where the permissioned emails, scanned documents, etc. are located. Finally, the copyright documentation can then be saved in the resources section of the course itself. Some instructors opt to move all related files, such as copies of emails, scanned copies of licenses, and the permissioned artifacts, to the resources folder as well. Others try to obtain all permissions via email and create a special folder within their email application to store them.

Make your life easier by tracking all your copyright business for each course in its own copyright documentation summary.

Explore the Copyright Documentation Summary Template by clicking the link below. This will take you to an interactive activity that will help you understand this template better.


2 thoughts on “Tracking Copyright

Making PDFs Work for Everyone – an ODEL IDeaBook blog contribution

In a new contribution to ODEL’s IDeaBook blog, I write about Making PDFs Work for Everyone. The blog answers the question why want might want to consider using PDFs and how to ensure that what you publish in PDF form is accessible for screenreaders.


https://ideabook.wp.txstate.edu/2019/08/19/making-pdfs-work-for-everyone/

Making PDFs Work for Everyone post Screenshot


Snapshot

Type of Interaction: Student with content
Type of Course: Face-to-Face, Flipped or hybrid, Online
Tools Used: Adobe Acrobat

Credit
Bruce Coonce, Asst. Director, Office of Disability Services (ODS)


Many instructors want to convert their documents into PDFs before uploading them to online learning spaces. Sometimes this conversion is simply to help prevent students from downloading and editing the document. However, PDF creators Adobe and PDF Expert tell us there are a myriad of reasons why one might want to present a PDF rather than a Word document. Like other types of documents an instructor might upload to their course (i.e., Word, PowerPoint, Excel, Pages, etc.), it is important that people with disabilities have full access to the document—meaning in most cases, that a screen reader, such as JAWS or NVDA, can read aloud the content so that those with visual or cognitive disabilities can receive information that the material provides.

What are PDFs?

PDF (Portable Document Format) files are universal. PDFs were purposefully created to assist in the sharing of documents across computer operating systems. These files are difficult to modify if you do not have the proper PDF software and even more difficult if you adjust the file’s settings to prevent editing. There are several PDF readers—applications that only allow you to view, save a copy, or print a PDF—including the widely known Adobe Acrobat Reader.

Why use PDFs?

There are many reasons to create PDF documents or convert your other documents to PDFs. The folks at PDF Expert (2018) provide several specific advantages:

  • Portability – With PDFs, there is no fear of using a special font only to have your readers not be able to see that special font because they don’t have it on their computer. Sometimes images are missing when one tries to open a PowerPoint file. These are non-issues with PDF files.
  • Universal compatibility – PDF file formats became standard in 2008. All operating systems can open PDF files. Even most browsers can open a PDF in a new tab, and most operating systems come with native PDF readers, such as Preview for MacOS.
  • Reliability – Not only do fonts, images, etc. stay within the PDF file, they appear to others as they do to the document creator. How the PDF looks on your machine is exactly how it will look on someone else’s.
  • Ease of creation – Most applications, including Word and PowerPoint, will export files to PDF. The exported file may look different depending on which version of the application you are using and what operating system you are using. Check your application’s help section for specific information about PDFs.
  • Security – You can password protect a PDF, thus making it impossible for someone to edit and make changes to your document, either purposefully or accidentally, unless they know the password.
  • File size reduction – Often times when a PDF contains a number of images, the file size can be so large as to make sharing via email or uploading to some sites particularly difficult. As long as you are willing to reduce quality of those images, you can reduce the size of the PDF to make it small enough to send or upload.
  • Version independence – Some time ago now, Microsoft decided to change their file types from .doc or .ppt to .docx and .pptx. While this was done with very good reason, if you don’t have the newest versions of the applications, you might not be able to open .docx or .pptx files. PDFs don’t rely on versions—they are universal and can be opened no matter what PDF reader you use.
  • Detailed feedback – Depending on the PDF reader, there are a variety of ways to add feedback to a PDF, including comments, highlights, annotations, etc. Since there are many PDF readers for tablets and smartphones, you can even provide feedback on the go.
  • Versatility – PDF Expert tells us that the PDF file format is a “very practical format. In effect, it becomes what you use it for.”

Adobe Reader (2019) adds a few additional reasons for using PDFs:

  • Reading is free – Most readers are free to use!
  • Mobile access – There are many free applications for reading PDF files on your smartphone and tablet.
  • Completely searchable – Use the PDF reader’s search tool to look for specific words.
  • Potentially interactive – Depending on what PDF creator you have, you can create a robust, interactive document with various types of form fields (i.e., fill in the blank, checklist, drop-down, etc.)

How do I convert my existing documents into PDFs?

If you owned or had access to a PDF maker such as Adobe Acrobat, you could simply begin using the application to create a document. However, many instructors have already created their documents in applications such as Word and PowerPoint.

The Office of Disability Services (ODS) has created Creating Accessible PDF Documents. In steps 1 & 2 of this document, you will learn how to first make your existing Word document accessible by paying attention to font styles, color contrast, using alternative (ALT) text for images, and running the application’s accessibility checker. Then you will learn how to export the Word document to PDF. These directions are written specifically for the Windows version of Word. You can find more information and learn how to replicate these steps on MacOS at the Creating Accessible Documents site. (You will need to use your Texas State NetID and password to access these directions.)

PDF accessibility

With so many powerful reasons to consider using PDFs, including increased accessibility regardless of the computer operating system or document creation software, one question remains: How can I make my PDF accessible for those with vision related or learning disabilities who would benefit from the use of screen readers?

ODS’s Creating Accessible PDF Documents continues to provide step-by-step guidance for making your PDF accessible in steps 3-5. These steps include: Setting the Reading Order, Inserting Alt Text, and Running the Adobe PDF Accessibility Checker. More information, including making accessible tables in Word and PowerPoint, can be found at the Creating Accessible Documents site.

Conclusion

There are many types of disabilities and many ways to provide accessible content to our learners. For more information on accessibility, the law, and additional considerations, please see the IDeaBook post Is Your Course Accessible for All?

Resources

Adobe (2019). PDF. Three letters that changed the world. Retrieved from: https://acrobat.adobe.com/us/en/acrobat/about-adobe-pdf.html.

Adobe Reader (2019). Top 10 Reasons to use PDF instead of Word, Excel or PowerPoint. Retrieved from: https://blogs.adobe.com/documentcloud/top-10-reasons-to-use-pdf-instead-of-word-excel-or-powerpoint/

PDF Expert (2018). Why it’s better to use PDF files instead of Word, Excel or Powerpoint documents. Retrieved from: https://pdfexpert.com/blog/why-its-better-to-use-pdf-files-instead-of-word-excel-or-powerpoint-documents

Reflection as a Powerful Learning Tool – IDeaBook Blog contribution

One of my favorite quotes is from John Dewey – “We do not learn from experience…we learn from reflecting on experience.” This is why I always encourage and sometimes coerce my students to reflect on their learning. I encourage my faculty clients to do the same. In this ODEL IDeaBook post, I talk about the importance of reflection, reflection as part of the primary faculty development training we were providing at the time, and several ways to allow for reflection in any given course.

Reflection as a Powerful Learning Tool

Reflection as a Powerful Learning Tool blog post Screenshot

Snapshot

Type of interaction: Group, Individual, Face-to-face


“We do not learn from experience . . . we learn from reflecting on experience.”
~John Dewey

Reflection is a powerful thing. It provides us the opportunity to learn from our experiences. This important learning method is one we strive to provide and model with our faculty development participants in order for them to reach what Mezirow (1991) called “transformative learning”—or “a process of learning through critical self-reflection, which results in the reformulation of a meaning perspective (the way we understand the world) to allow a more inclusive, discriminating, and integrative understanding of one’s experience” (Cranton, 1994, p. 730). As adults, we have already formed our foundational beliefs, values, and assumptions about life, morals and ethics, learning, etc. These well-developed internal beliefs, values, and assumptions can be challenged by new people, events, contextual changes, crises, and new experiences (Cranton, 1994). The more central a belief, value, or assumption, the more difficult it is to change. Reflection can be used as a catalyst to facilitate changes in beliefs, values, and assumptions regardless of how central to our core they sit.

(More posts on Reflective Practice)

Reflection in Faculty Development

In our Foundations of/Advanced Online Course Design and Development faculty development course, we ask our participants to reflect on many topics.  One important topic we reflect on includes new teaching methods and strategies aligned more with constructivist and socio-constructivist paradigms.  Frequently, these new methods and strategies do not align with currently implemented teaching methods and strategies, which are often based on the faculty member’s current set of beliefs, values, and assumptions about the learning process. In this case, reflection in our course occurs mostly informally through discussions between participants and their instructional design consultant, in small groups with other faculty also facing new information and experiences, and in whole-group, reflective conversations.

Reflection opportunities for learners of all ages include:

  • Individual, Pairs, and Whole Group (IPW) reflection. This is similar to reflection exercises we do in our faculty development in whole groups. A specified period of time is given for each step in the reflection: we start with (I)ndividual reflection, which is then discussed in (P)airs, and finally brought to the (W)hole group. For example, I=2 minutes; P=5 minutes, and W=10 minutes.
  • What? So what? Now what? This popular reflection structure can be applied to oral and written reflection, individually, in pairs, or in groups. “What?” answers the descriptive aspects of what has been learned: facts, what happened, who, when, and where. “So what?” questions shift from descriptive to interpretive by answering why, interpreting meaning, and associating multi-perspective emotions or feelings. Finally, “Now what?” questions seek to place what has been learned into the larger picture or context, apply lessons learned to new situations, and/or create a plan or set goals, stating intentions for use in context.
  • Surveys or questionnaires. Use questions that specifically illicit reflective responses. These will most often be open-ended. Consider providing sentence stems such as: “Today I learned . . .”, “I don’t understand . . .”, “The thing that surprised me today was . . .”, etc. See Higher Ed Professor for more. Ask extension questions for deeper reflection, such as “Why?” or “How?”.
  • Journals or blogs. Journals are typically between the student and the instructor, while blogs might be read by other students. Students do not always know how to journal or blog in a truly reflective manner; thus, they may need to be taught explicitly how to do so (Muncy, 2014). Consider using metacognitive modeling to model the reflection process for your students. See Muncy’s article for reflective blogging (journaling) assignment considerations.
  • Reflection videos. Have students reflect orally and submit as a video. These videos should be kept short, preferably in the range of 3-6 minutes. You could provide the same sentence stems from Higher Ed Professor.
  • Video/document discussion. Use applications, such as Voicethread, to post a video of a performance or skill application (i.e. teaching a lesson, triaging a patient, etc.) and use time-stamped comments to reflect on what is seen/heard.
  • Discussion forums. Encourage students to reflect and ask questions. Have students respond to each other by adding to those reflections and answering questions.
  • One-minute papers. Check out OnCourse Workshop for some great prompts.
  • Sketch reflections. Check out Derek Bruff’s blog for inspiration.
  • Reflection snowballs. Everyone writes one key reflection, crumples their papers, tosses it to another student who reads it and adds to it.

This is a short, 10-item list of possibilities. Many more exist. Please check out the resources below or Google terms such as “reflection activities in higher education” to find many more.

Resources

Ahmed, Z. L., Hutter, L., and Plaut, J. (2008). Reflection in Higher Education Service-Learning. Scotss Valley, CA: Learn and Serve America’s National Service-Learning Clearinghouse, 2005/2008. Accessed 4/24/19 from: https://www.usf.edu/engagement/documents/reflection-in-he-sl-fs-short-sept08.pdf.

Huang, L. (2017). Three ideas for implementing learner reflection.  Faculty Focus. Accessed 4/24/19 from: https://www.facultyfocus.com/articles/teaching-and-learning/three-ideas-implementing-learner-reflection/.

Whenham, T. (2019). 15 ways to spark student reflection in your college classroom. Nureva. Accessed 4/24/19 from: https://www.nureva.com/blog/education/15-ways-to-spark-student-reflection-in-your-classroom.

AERA fun in Canada!

This year was the first time for me to travel out of country for a conference. I’ve just never been in a position to do so before. Greg and I had to get new passports, we realized how ugly customs can be, both coming and going…  But, overall, we had a great time. Again we got to eat dinner with friends, specifically Joan [Hughes] for her birthday! On the last day, Greg and I decided to go visit Casa Loma in old Toronto. This was easily my favorite bit!

The flight home was a bit of a struggle. We literally took every mode of transportation possible: car, boat, bus, train, airplane. Ok, not scooters.  🙂

I presented the paper co-written by Tammi Butcher and Gwen Morel, my colleagues at Texas State University. The paper is titled, “Comparing Faculty Preferences with Identified Effective Faculty Development Design“. I also chaired and acted as a discussant again for several sessions this year. I enjoyed it.

Toronto2019

Is Your Course Accessible for All? – An ODEL IDeaBook Blog contribution

I have recently co-authored a blog post for our ODEL’s organizational blog, IDeaBook. The piece, co-authored with David Bruce Coonce, the Assistant Director of the Office of Disability Services, is entitled “Is Your Course Accessible for all?”

https://ideabook.wp.txstate.edu/2019/02/11/is-your-course-accessible-for-all/


Is Your Course Accessible for All? blog post Screenshot


Snapshot

Type of Interaction: Student with content
Type of Course: Face-to-Face, Flipped or hybrid, Online
LMS Used: TRACS
Tools Used: MS Word, MS PowerPoint, MediaFlo, Adobe Acrobat


Bruce Coonce is the Assistant Director of the Office of Disability Services. He worked with one of our Senior Instructional Designers, Michelle Read, to produce this post.

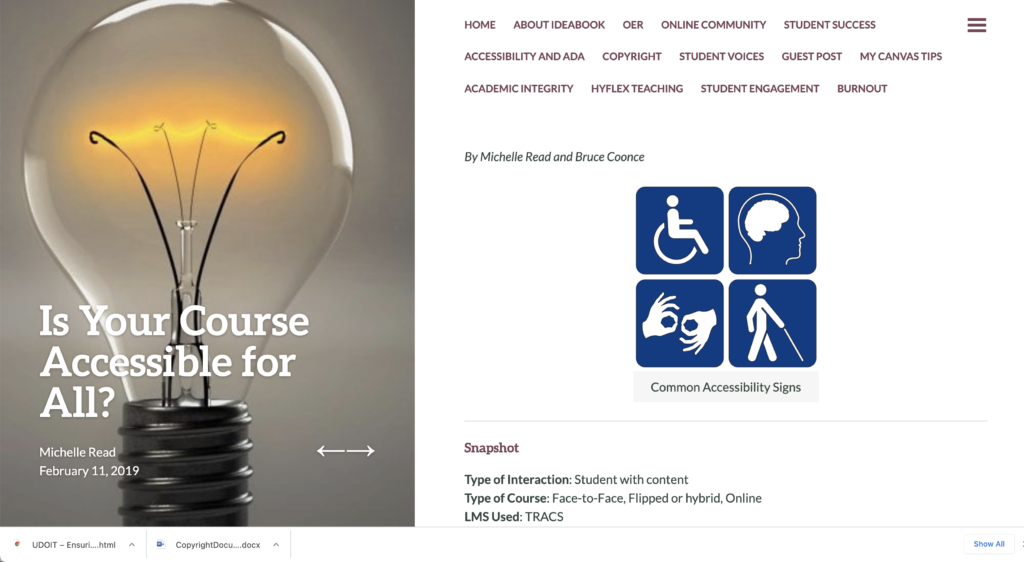
The Americans with Disabilities Act is a civil rights law enacted in 1990 that prohibits discrimination against and provides equitable opportunities for individuals with disabilities in public and private places that are open to the public (ADA National Network, January 2019). In accordance, as public university instructors, we must provide accessible documents, media, and webpages to students with a demonstrated, disability-related need, and we must do so in a timely manner. We recommend being proactive by preparing content materials with accessibility in mind from the start. In this blog post, you will be presented with 10 important considerations for ADA compliance while planning and developing course content.

For Screen Readers in Webpages and Documents

1. Use styles and page breaks.

2. Format table headers and rows.

3. Use Alt Text for images, graphs, and charts.

4. Use meaningful, contextual hyperlinks.

Screen readers are applications that read text in documents and webpages aloud and help users navigate websites. This is particularly useful for students who are completely blind or who have very low vision. These applications are programmed to identify text elements, such as headers, page breaks, table headers and rows, etc., and alternative text, or Alt Text, for charts, graphs, and images. Failing to identify these elements means that screen readers will not know how to navigate, or will have difficulty navigating, your document or webpage. Read below for more information about screen readers and PDF files.

Screen readers also read hyperlinks aloud, meaning, if you write “https://www.eebew.com/seo-tutorial/on-page-seo/basic-elements/internal-navigation/contextual-link-building/”, the screen reader will read it just the way it is written. Instead, use meaningful hyperlinks, which are embedded within the context of a sentence, for example, “Read Contextual Link Building for more information.” Here you can see that the title of the webpage, “Contextual Link Building”, is hyperlinked to the webpage.

Captions and Transcripts

5. Use captions and/or transcripts for video and audio files.

Captions are particularly useful for students with hearing impairments. However, they are also useful for students with minor hearing loss and issues with processing. Even students without a documented need for assistance benefit from the use of captions and transcripts. At Texas State University, any videos made by instructors and uploaded to MediaFlo can be captioned or transcribed from within the MediaFlo application. Many YouTube videos are captioned, but most have auto-generated captions with many mistakes. Transcripts can be created for YouTube, TED talks, and many other 3rd-party videos.

For Webpages and Documents

6. Use traditional default web fonts and styles and alt text.

7. Limit use of animations.

8. Use contrasting colors and avoid color-coding.

As mentioned earlier, the use of styles and alt text is essential for screen readers to “read” text in both documents and webpages. Be sure to identify your headers as such and provide alternative text for each image, describing its purpose in placement. Even if your image is simply decorative, with no educational value, then describe it as “decorative image only”.

For those with visual impairments, but not complete blindness, it is also important to stick to web-safe fonts, typically sans serif, which are the default fonts used by most applications and website builders. “Normal” styled default text is typically set to 12-14 points with various headers at incrementally larger sizes. Consider making “Normal” text in PowerPoint even larger, at 18 point. This is particularly important for many people with dyslexia. Curly-ques and adornments on some fonts increase reading difficulty. Most webpage building applications default to fonts like Arial and Times New Roman, because these fonts are readable by any computer, whereas some unique fonts aren’t readable by all computers and browsers, etc.

In applications such as PowerPoint, it is also important to limit animations. Animations should have a specific purpose, such as to aid in understanding.  It is important to use simple animations rather than complex ones. Low vision readers often have to wait for the text to stop moving before they can read it. Effects that deliver bulleted lists one by one or in small chunks are good because this helps readers focus and avoid being overwhelmed by too much text on the slide all at once.

For students with low vision, certain eye diseases, including macular degeneration or glaucoma and color-blindness, it is important to use contrasting colors on your websites. Lime green, for instance, doesn’t really work well on a computer screen, particularly if you insert white text within it. It’s also important to avoid color coding (aligning red text with a specific assignment for example). While color coding is useful for many students, for students with low vision and/or some degree of color-blindness, the coding may be pointless. If you choose to use color-coding, reinforce the code by using bolding and/or italics for those who cannot discern the various colors.

PDFs

9. Convert PDF text images to OCR.

Not all PDFs are created the same. We often try to help students by scanning documents or book pages (don’t forget to consider copyright here, too) and providing the scans to students electronically. Unfortunately, when we scan, we often forget to convert our scanned image to text using OCR (Optical Character Recognition). Screen readers can only navigate and read PDFs that have been converted to OCR. You want to make sure after conversion that headers and table elements are identified correctly through styles, and that any images, charts, graphs, etc. have alt text applied.

Some students with other disabilities, such as dyslexia, may also benefit from using text-to-speech tools. These tools simply read the text given on the page. However, text-to-speech tools cannot read PDFs that are simply images of text—any image of text must be converted to OCR. You can create scans with OCR through Adobe Acrobat, which is free for any Texas State University employee.

Accessibility Checkers

10. Use built-in accessibility checkers

Microsoft Word and PowerPoint, Adobe Acrobat, and many webpage builders and learning management systems (LMS) have built in accessibility checkers. They will identify accessibility issues and usually provide helpful information for correcting them.

For more information on how to make your Word, PowerPoint, and Adobe documents accessible, please visit the Office of Distance and Extended Learning’s Creating Accessible Documents for both Windows and Macintosh operating systems. You will need to use your Texas State NetID and password to access.

10 thoughts on “Is Your Course Accessible for All?

  1. The article does not discuss the importance of audio description for videos. Just providing a transcript for students with a sight-impairment is not enough; they need the audio description overlay.

    • Hi Jennifer,

      Thanks for your answer.

      By the way, when I said “the post says to either close-caption a video or pair it with a transcript” I was trying to paraphrase part of the discussion of consideration #5. But maybe I misunderstood that section.

      Cheers,
      Jonathan

    • Hi Jennifer,

      Thank you for the post. You are absolutely correct about the importance of audio descriptions for the sight-impaired. There are many aspects to student accessibility, and this blog post only addresses a short, concise list that Bruce and I felt were easily addressed by faculty. I anticipate quite a bit more will be forthcoming.

  2. One more question: the post says to either close-caption a video or pair it with a transcript. So just to be clear: closed-captioning isn’t necessary and including a transcript makes the content in the video adequately accessible to all students?

    • Hi Jonathan,

      That’s a good question. I suppose technically providing only transcripts meets the accessibility requirement adequately. However, keep in mind that hearing-impaired students would have to read a transcript and watch a video simultaneously. Whereas, with captions the words overlay the video, making it much easier to watch the video and read at the same time. I’ve heard Bruce say that transcripts in addition to captions are nice, so that students can quickly scan and review transcripts for content later. I’ve heard other instructors say that all students like having transcripts available for that purpose. Luckily, MediaFlo now has the options to include a searchable “Interactive transcript” option for each captioned video. Students can then copy and paste pieces of the transcript as/if needed. Therefore, if you order/create captions for your MediaFlo-stored video, you automatically have transcripts.

  3. Thanks for the post!

    Question: how easy would it be for a blind student to add different styles to a Word document? The purpose would be to allow them to jump around the document so that they could more easily compare one line of text with another several lines later.

    • As long as the student knows keyboard shortcuts or how to find the styles in the ribbon using the keyboard, they should be able to add styles. If they need to check styles in the document, they can do a JAWS (insert on the numlock) key with the letter V and get into the verbosity setting. They can change JAWS to read formatting.

Recording Demonstrations Using Tablets – a LxD IDeaBook Blog contribution

Our department, Learning Experience Design (LxD) has created a new blog for instructors at Texas State University, It’s purpose is to….

In my first post contribution, I write about Recording Demonstrations Using Tablets. It describes the process of connecting your tablet to your Zoom meeting to demonstrate concepts by hand.


Recording Demonstrations Using Tablets blog post Screenshot


This post describes a solution for sharing processes, explanations, etc. that students may need to review repeatedly.

Description

Using whiteboard apps with a stylus and screen recording tools on tablets is an easy way to model processes, demonstrate concepts, solve equations, or present other content that is visual in nature. You can upload your video to Mediaflo and share the url (permalink) with students so they can review the content. Learn more about Mediaflo.

Students can also use whiteboard apps to demonstrate their thought processes while solving a problem. For example, let’s say Anik is having difficulty solving a statistical problem. You can have Anik attempt to solve the problem via the whiteboard application while thinking aloud as he solves the problem. You can then view the recording to analyze any missteps in attempting to reach a solution. Anik can upload his video to TRACS or ePortfolio, or otherwise share it for feedback.

Process

There are a variety of whiteboard apps available for iPad and Android devices. See the table below for some free or low-cost suggestions:

* This app even has its own recording feature.

To begin:

  1. Start your device’s recording function (see the following section for help).
  2. Open your preferred whiteboard application.
  3. Demonstrate your concept including your narration. Students are more likely to view the full recording if you keep it short, for example 3-5 minutes.
  4. Stop your recording and preview. It is not uncommon to take several tries before you are satisfied with your recording.
  5. Trim any unnecessary opening or ending steps from your recording so that it includes only the demonstration. Upload your recording to Mediaflo and provide the Mediaflo link to your students. Learn more about Mediaflo.

Screen Recording on iOS and Android

Before you start, you will need to determine the best way for your tablet to screen record with audio if you are not using a whiteboard application with built-in recording features:

Mac iOS comes with a built-in screen recording feature. To access:

  1. Swipe up to enter the Control Center.
  2. Tap and hold the Screen Recording icon shown below to open the Screen Recording options window.
  3. Tap the Microphone icon to turn on the microphone (the icon will turn red). .
  4. Tap Start Recording and swipe to close the control panel.
  5. Record your demonstration.
  6. To stop the recording, tap the red bar at the top of your device or swipe up and use the Screen Recording window.

IOS 1IOS 2

Android devices do not come with built-in screen recording, but you can find various screen recording applications in the app store. One such free application, D-U Recorder, has many features including easy access to recording and settings adjustments including the use of audio with video. The record button sits off to the side of your screen to be accessed at any time regardless of what other application you may be running. Click the floating camera button to see additional settings/features buttons. Learn more about how to use D-U Recorder.

IOS 3

One thought on “Recording Demonstrations Using Tablets

  1. I learned about Explain Everything this summer and never thought to use is for a student to share how they’re thinking. Great idea!

NYC – AERA 2018

Greg and I jaunted off again for this year’s AERA conference, held in New York City. This time, we took Abby too. We visited the 911 Memorial with Joan [Hughes] and her husband, Lee, and took in a Broadway show, Wicked, with them as well. Of course, we visited Ellis Island and the Statue of Liberty. Like D.C., there is just too much to do in one short trip to NYC.

The AERA conference itself was fantastic as usual. This year, I didn’t present, which was a first. I attended many sessions and took back many thoughts to share with my team at Texas State.

NYC2018